Saturday, December 28, 2013

2013 Wrap Up

I'm pretty happy with what I've completed this year:
3 pairs of pants
1 pair of pants for the husband
3 knit tops (Bonny Knit, Pastel Renfrew, and Striped Cabarita)
3 dresses (Anna 1, Anna 2, Red Velvet)
1 blouse (see below)

Apparently I do things in 1s or 3s.

What I learned this year:

  • I learned how to do French seams, which are not that hard. I have bad spatial reasoning skills so I do have to think them through a couple times to make sure I've got it right (and I usually try a sample on some leftover fabric), but they really give a nice, beautiful, clean finish to the inside of a garment.
  • I tried to learn how to make my own bias binding, but I failed miserably. Luckily I had some store-bought in about the right color, so used that to finish the blouse where I had planned on my own bias binding. See above re: bad spatial reasoning skills. Maybe I'll try again in 2014, but I'm okay with store-bought bias binding.
  • I learned how to do a FBA, which is a big part of why I sew. Also not that hard. My plan is to learn more fitting skills in 2014. There's something weird with my shoulders that I haven't quite figured out yet.
  • I scrapped two projects - one pair of pants that was in the UFO pile (they were there because I realized I wasn't going to like them even if I finished them), and a top that if I had been reading pattern reviews I never would have started. Ick that thing was terrible.  (Thus I learned when it's time to give up, and to always look for pattern reviews before starting a project.)

Blouse

I haven't gotten around to really blogging the blouse, so I'll just do it here and get it over with. I made the Colette Jasmine blouse in a cheap polyester silky (that wants to be swiss dot and charmeuse all at once). Because it's pretty see-through when held up to the light, I opted to do French Seams. I wound up not doing them on the sleeve insertions, since I chickened out of figuring out how do to that, and I had already discovered the fabric wasn't as see-through as I thought. (In fact, I thought I might have to wear a camisole underneath to make it work appropriate, but it's fine without it.)
Otherwise, the result of the french seams is that the inside of the blouse looks fantastic! It really is a beautiful, clean look. Again, because of the semi-sheer nature of the fabric I opted for bias binding to finish the neckline (see failure above), and interfaced the sleeve cuffs with a beigish organza.

Alterations

And let's do talk about the sleeve cuffs. They are ridiculously small. While I made the top, generally, in a size 4, I had to go up to the size 14, yes 14!, cuffs to make them fit. Because the sleeve is gathered I didn't do any other alteration to the sleeves to accommodate that change.
I did make a muslin of this, and made some alterations in the process - a high bust/short upper torso adjustment, and made the neckline smaller - it was extremely gapey, and way too low, even with the other adjustments. In the end I went too far, so before making it again I'll need to find the happy medium. Oh, and I wound up taking some darts in the back of the muslin to make the back of the blouse not stand inches away from my body. I transferred those to my pattern before cutting, and thus had to redraft all of the collar pieces as well.
I also should have made it longer. While it covers the top of pants, it only barely does. I do have a long waist, but I'm short enough overall that I don't usually have to make too many adjustments there. I could use at least 2 more inches. And I should have done a FBA, but between Colette being drafted for a C cup (which is smaller than I wear, but hey!), and the muslin seeming okay in that respect I didn't do it.

I will probably make this again, but I will probably play around with altering the neckline more seriously. I mean, how many bow blouses does a girl need?

Independent Pants Pattern Face-off

There aren't too many reviews for the Colette Juniper pants, but there seem to be in the thousands for the Sewaholic Thurlows. The Junipers also seem to be on everyone's to sew list, but apparently no one ever gets to them. That made it kind of hard to choose between the two. So, now that I've made both, I thought it would be handy to compare the two.

Junipers

These have a fairly curved waistband, which is not surprising since Colette patterns are drafted for more of an hourglass shape. Out of the envelope, the size 6 fit me quite well. I don't think I made any changes to these pants. 
While I love a wide-leg pant (LOVE), these are kind of too wide in the wrong places. I've seen someone's who don't seem to have this problem (I thought it was Mary, but can't find evidence to support that thought) but she (whoever she was) thinned the legs out. On the other hand, they do swish nicely when worn dancing. Standing still, however, they're a little overwhelming. I whole-heartedly endorse these for swing dancing. (I caught a glimpse of them in the mirror a couple times coming out of swingouts and they really were nice.) I may yet try thinning them out some through the mid parts of the leg. 
I also suspect they might be less overwhelming in a lighter fabric - I think a linen would really work, although I usually see them made up in thicker fabrics (denims, twills; mine are a mid-weight RPL).
The few reviews there are do talk about the legs being too wide. But I found myself justifying that as that many people maybe just don't actually like wide leg pants. (Whereas I really do. I still have a much loved pair I made many years ago with 49" hems. They are awesome.)
(These also have a slightly weird poofiness at the edge of the front pockets. I suspect that has something to do with how I stabilized the edge of the pocket, but am not sure exactly what went awry.)

Thurlows

Sorry - black
The Thurlows are a much nicer shape, while still being somewhat wide at the bottom. I have not worn them dancing, so can't comment on the swishability of them.
Since Sewaholic drafts for pear shaped figures, I would think that for pants they'd be pretty much fine. But no.
The Thurlows did not fit right out of the envelope. I first muslined them in a size ten. They were huge. I lost five pounds. I made them in black RPL (relatively expensive stuff, from Emma OneSock, that is now pilling on the underside of the legs) in a size 8. When I sewed the back seem, I had to sew with a more than 3" seam allowance to get them anywhere close to fitting. Now they do stay up, but they're a bit loose, and if I lose another 5 pounds they'll be too big to wear. And since the back seam is so big, the side seems hangs weird, and it feels weird where they pull across the back of my legs.

Pair #2 was made in cheap RPL from Joann's that seems like it will be fine (i.e., not pill). In a size 6. I totally screwed up the back welts, however. I managed to mark one a little high, and one a little low. The result is that while the individual welts are nicely done, one is maybe an inch higher than the other. And of course I didn't realize this mistake until it came time to finish the back seem. Lovely.


On the bright side, I am usually in a sweater, and most sweaters I own will cover one or both welts. If it starts to bother me I may try to even the appearance of one or both out with a flap over the pocket. 
These pants are still too big, however. The back seam is still nearly 3". If I lose some more eight, per the plan, they'll no longer fit either, and can't be taken in any. Oh, and the fabric is pinstriped. And I did not make any attempt to match up the pockets when I cut them out, yet it does match, almost perfectly. Apparently the screw-up with the welt pockets was karma for that working out so well.

The pocket construction is much better designed in the Thurlows, so you don't see lining peaking out. I did stabilize the bias edge of the pants front for the pockets in pair #2, and I highly recommend that step. On the first pair they gape a little because of the stretch.
The fly construction is different in both, but I don't really have a preference. 

Oh, and where, in real live fabric stores, does one actually find batiste? Thurlow #1 used some cotton that is really too thick for lining (since the pattern requests batiste), Juniper used leftover poly silky from another project, and Thurlow #2 used bemberg left from another project (with self-lined waistband).

Conclusion

For a beginner, the Junipers would be easier, but that's not a superior pattern issue as much as a fewer included options issue (no welt pockets, the front pockets don't have the other lining pieces, etc.). 

I compared the waistband pieces of the two, and they don't seem that different, but the Juniper waist fits much better. I also find the Juniper waistband construction easier. (I actually laid out the two waistbands when I made Thurlow #2, fully planning to use the Juniper waistband, and then convinced myself they weren't that different, so didn't. Looking at them now, the Juniper does curve more - it's just that because the pieces are cut on the fold, it seems less noticeable).
In many ways the Thurlows are better designed. With a good sewalong available, they seem pretty beginner friendly. 


(Based on size 6)JuniperThurlow
Waist (i.e. top of pants)2932
Bottom leg circumference25 ¾24
Knee circumference25 ¾18 ½
Finished Waist (pattern back)28 ½32
Finished Hip (pattern back)4043
Size waist2827
Size hip3839
45" fabric needed2 ⅞ 3 ¼
60" fabric needed2 ⅔2 ½

Ignore the color. . .
So that explains a lot right there: The Thurlows are drafted with 5 inches of ease in the waist while the Junipers are drafted with 1/2 inch of ease in the waist. How are pants with 5 inches of ease in the waist supposed to stay on? Also, since these pants don't sit at the actual waist, what do these waist measurements really mean?

Here are some other cute junipers.

So, what next? Well, I've got two different pieces of fabric set aside for more pants in 2014. I think I'm going to frankenpattern the heck out of these two patterns. Maybe Junipers from top to crotch and Thurlows from pockets to hem. I may try muslining the Thurlows in a 4 though, just to see.

Friday, December 20, 2013

Chevrons and a lesson in steam a seam

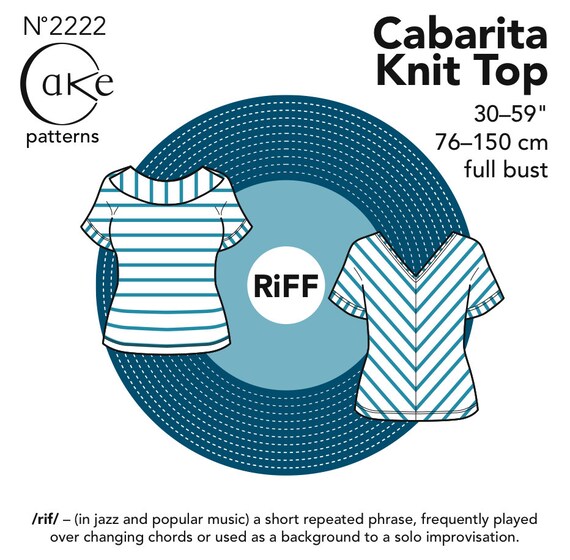
I really do like the sizing for Cake Patterns. Here's a first stab at the Cabarita top.
Since I'm almost always wearing a sweater, going to the trouble to do chevrons on the back of the shirt just doesn't make sense. You'd never see them. So I dispensed with the collar, and planned for the chevrons in the front. I've never sewn anything that really required matching the fabric up carefully, so that was a first. I did a pretty good job of matching the three different stripes up in cutting, but some of them got off by a little bit when it came to sewing it up (stretch fabric being stretchy and all).
Note that on my dressform it looks better, since my dressform doesn't have the high bust/short upper torso issue.
I used steam a seam to help with the bottom hem (and stitched with a twin needle). It looks okay, but it feels super crunchy, and killed the stretch. Since I cut the top without much lite. Which is apparently what I should have gotten. Or fusible thread.
negative ease that's okay too, but it doesn't feel good. And thus I learned that there's also steam a seam
I also should have done a high bust/short upper torso adjustment of some sort, and, looking at the pictures of the back, maybe a sway back adjustment? It never occurred to me that that was a problem I have, but maybe so.

I cut the band for the neckline so the stripes go across it (perpendicular to the stripes of the chevron), and I'm not a huge fan of that. I think I would have liked it better if I'd cut a stripe so it would be one solid color.
Also, what's up with the sleeves? I by no means have tiny arms, but the sleeves are either too wide, or not floofy enough.

(Fabric for this is a 7oz cotton jersey from Girl Charlee. Too thin, but not by much.)

And it's really too short. Not terribly so, but I could have used some more length in the front especially (I did not do a FBA, but maybe I should have gone down a size, done a FBA, and made it a bit longer). (It's not crooked in the I cut like it appars here. That's just some quirk of how I am standing.) I cut the 35, at the 24" length, and chose the cutting lines not based on my measurements, but based on some of my favorite rtw knit tops. In lighter weight knits, I've found negative ease to be a bad thing, and I found that my my favorite shirts had the following measurements (1/2 of the front)

At waist At hip
8.5 9.5
7.5 8.5
8 10

So, I wound up putting the waist at about 32.5, and the hip at 37. This is not just no negative ease, but some positive ease through the waist, and a tiny but of negative ease in the hip. 

Monday, November 4, 2013

Gold and Green Anna

I had this gold and green brocade in my stash. Once upon a time I must have bought it for a specific project, but it was long enough ago that I have no idea what that was. Oh well. Free fabric, am I right?

It turned out there was enough for the midi length Anna, even with lengthening the bodice and needing to use a "with nap" layout. Hooray. It may be a little on the stiff side for the skirt to hang as it might otherwise, but I think it looks fine.

That white blur is my dog. He never slowed down
enough for me to get a picture that wasn't blurry.
Am I the only one whose pets decide fabric out on the floor to cut means it is time to go crazy? The cat started stalking the dog, and the dog decided he needed to play with the cat's pyramid bed. So yeah, cutting took a lot longer than it should have.

While I'm not a terribly fast sewist, this is a pretty quick project. In a portion of one afternoon, I got the remaining pieces traced, the fabric cut, and everything but the zipper and finishing steps done. (Well, and I decided I'd like this dress more if I lined the bodice, so I didn't cut/sew the lining the first afternoon, since that required a trip to the fabric store - as did the zipper.) Oh, and I serged the edges of everything too, since this brocade frays like crazy.

I'm short enough in my legs that I was able to cut quite a bit off to get a decent length when I hemmed this. I imagine in 60" wide fabric I could probably get away with 2 1/2 yards.

One thing I struggle with is getting my seems a consistent width. I don't know why this is so hard for me. I guess I need to slow down? Anyway, my skirt pieces were not matching up with the bodice even remotely correctly, so I had to go back and make some seems bigger, and others smaller. Even then my skirt section was a tad bit longer (er, wider?) than the bodice, but I figured I could even that up at the zipper stage. 

I did manage to find some bemberg lining at Joann Fabric, so that's what the bodice is lined with. (I didn't line the skirt - I'm one of those weirdos who wears slips.) For some reason I selected a creamy color, which maybe wasn't the best choice. (There weren't a lot of choices.)  I think this is my first item lined with Ambiance instead of the cheap poly or acetate junk so I'm interested to see how I like it after more wears. At the moment, I like it - it has a very creamy soft feel to it. I wound up stiching the lining down to the bodice around the neckline - not top-stitching it, but more like a modified blind hem stitch. It doesn't look amazing on the inside, but it's basically invisible from the exterior (while making the whole thing lay flatter and seem more secure.)

I realized after I finished sergimg the skirt panels together that I had been planning to add pockets. Oh well. Not going to unpick serging for it. I'm generally of the opinion that everything should have pockets. (I recently saw a shirt that had pockets. Want.)

There is some gaping in the front neckline. It can be pinched together in a huge mess, but is relatively unoticeable when left to its own devices. 

I wore this the other night for an event at my museum, and got a lot of compliments. My favorite was a woman who really wanted to know where I got it, and thought it had a great vintage look. 

Friday, October 18, 2013

Anna Dress Muslin


I'm working my way through an Anna Dress. Maybe two, depending on how the first comes out.

Muslin #1

I've been working on some necessary adjustments to the pattern. The principal thing I knew I'd need was a FBA. That accomplished, I realized I would need some other changes too. While I added an inch of length to the bust as part of the FBA, the bodice is way too short. While I am short (and particularly from bust to shoulder, which I did  shorten by 3/4"), my torso is actually pretty long from the bust down. I've never actually done a FBA before (which is funny, because that's a big reason why I sew), but am pleased with the result. While I have a couple fitting books, I do wish I could find a really good resource on bust-shoulder petite adjustments.

Version #2 

I added two inches to the gathered section of the bodice. I also had been debating on sizing. Muslin #1 was based on the US size 6, and was a little tighter than I'd like. If I were using a fabric with some stretch, I think I would have stayed with it, but I was getting progressively nervous so sized up a little through the waist. I also had to take some fabric out of the upper back, and did so following Ginger Makes' method.
(Is it me, or do independent pattern companies draft for broad backs? I don't think I have a particularly small back,  but I wound up having to invent some darts in the back of the Colette Jasmine, so I'm starting to wonder. On the other hand, it is more gapey on me than on the dress form...)

Planning

I'm planning to use a green and gold brocade from my stash for the dress. I think. If there's enough. I think I need to use a "with nap" layout, so I'm not sure until I actually get everything laid out.(And it's more green than the photo makes it's appear.)


Sunday, October 13, 2013

Cake Red Velvet Sewalong


Red Velvet Sewalong Penelope House
Next month I'll be participating in the Cake Red Velvet Sewalong. I'm moderately excited for this dress, since, although it's simple, it has a very similar silhouette to my two favorite (and most comfortable) dresses.

I also just bought some ITY jersey from fabric.com (that I can't link to, because I bought the last of it). I've been experimenting with different knits, and I think ITY may be the answer to my question of what the knits are that look a little dressier, that are often used in rtw. (You know, the ones with a little bit of sheen to them, without being shiny.) Since there was so little left in this particular fabric, and it was on sale, I didn't bother requesting a swatch. If it doesn't for some reason, seem like a good fit for the Red Velvet, I'm sure I can find a use for it.


Saturday, October 5, 2013

Not a Sailor Top

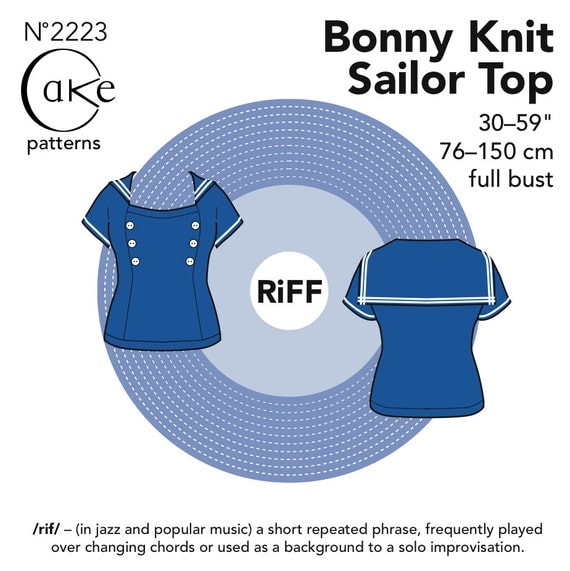
I recently made Cake Patterns # 2223, the Bonny Knit Sailor Top.
While I think the sailor-y version of this is cute, I'd rarely wear it outside of swing dancing, and we don't dance that much these days. It includes very brief instructions for making it without the collar.

Fabric:

I used a 7 oz teal rayon jersey. The fabric is not ideal here. It shows every lump and bump. If I wear a camisole under it, it is wearable. There's still a bit of unpleasantness over my stomach, but I think if I resume pilates/yoga I can probably get my stomach toned back up enough that that won't be an issue anymore. I've been slacking on the exercise. (And actually, it's not nearly as bad in the photos as it seems to me in real life.)

What I'm figuring out on knit weights:

(Table adapted and improved from a post  here.)
Weight Oz Notes
tissue weight 3 oz Fluttery and very translucent; layers must be doubled, at least in the front, for t-shirts
lightweight 5 - 7 oz Nice drape but will show indentations made by undergarments.  Could be an issue with rayon knits only at 7 oz? 
midweight 9 oz Firmer drape that skims more nicely over the body
heavier 10 oz Thicker, not at all drapey. See my Renfrew attempt.

Pattern:

Figuring out how to take these has been a pain. Any
place I've got a mirror has terrible lighting.

The pattern itself is quite neat. It's the first Cake pattern I've made. You customize the pattern based on your measurements (literally drawing some of the lines on, based on printed guides), and the result is a top that fits my figure pretty darn well. While I'm pretty short, I'm not exactly petite. My legs are short, my waist is long, but I have a high bust and/or am just petite from bust to shoulder. The result is that I think I need to do a petite adjustment so the sleeves sit in the right place.

I also had to re-cut the central panel as the neckline was way too low. Like not appropriate to leave the house in low. If I do a petite adjustment on future versions, that may solve this issue, but I'm going to have to do some testing as I go to make sure. When I re-cut the center panel, I added about two inches. Also, since the first version, with the top piece interfaced per the instructions, resulted in a neckline that wasn't just low, but also seriously gapey, I re-cut that piece too, doubling the height, folding it over, and stretching it taut as I sewed. Still not perfect, but better.

Because this pattern is a "riff," and the instructions are pretty brief (especially for the not sailor version), I'm not really clear if I did the neckline binding correctly or not. It seems like it might be best to do the binding, and then attach the center panel (i.e., in the reverse of how the instructions have it).

Part of the reason I was drawn to this pattern was the princess seeming. I have a rtw top that has very cute (similar) lines, and looks amazing on. In a less clingy fabric, I still think this has similar potential. (I'm also considering this book to learn the rub-off technique to duplicate it a little more exactly. I have terrible spatial reasoning skills, so while this would probably be quite simple for some sewists, I need more hand-holding.)

Oh, and I got a serger! This was the first thing I sewed using it. I've used one before (my mom has one), but I never quite felt I could justify the expense. So far I like it. Learning to thread  the lower looper was a major pain, but I think now that I've got it I should be fine.

Tuesday, October 1, 2013

Pastel Renfrew


Let's be honest: I like(d) the idea of a simple, pale pink t-shirt.  So I bought this Rosy Pink knit from GirlCharlee. The reality is that I don't look good in pastels. I used to know this, but apparently I forgot.
When I bought this pale pink fabric, I also bought a light blue. I now realize that that needs to be something else - either for someone else, or a different item. Right now I'm pondering some kind of skirt. Part of the problem here, I think, is that this fabric is a bit too thick. I seem to have over-corrected from all of the thin knits in stores these days. For a top, 10 oz. is too thick. What's just right? Anyone? Which brings me back to the skirt idea. Maybe some kind of pencil skirt.

Anyhow, so I made the Renfrew top. It doesn't quite fit right, and I don't know if that's an issue of the thickness of the fabric, or my grading between sizes. (In lieu of doing a FBA, I opted to try to grade between sizes, a la Lladybird, but I may have overestimated the waist size needed.)

I think I need to take up the hem band some,  but have been too lazy to try it out. Stretched out it looks okay (beyond the fact that it's practically a tunic), but there are some drag lines. I'll attempt it again, but will probably do a FBA.