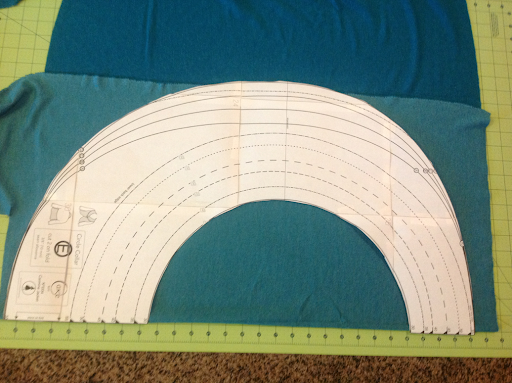
I found this lovely teal, ever so slightly sparkly ponte knit at Joann's and thought it would be perfect. I duly bought a yard and a half per the pattern's note that that was what I would need for a size 30. I opted to cut the 30D even though I probably should have followed the instructions to add extra to the bust. But then I realized that the next size up needed almost another full yard of a fabric, and there was no way that would work (plus, knits stretch! It would probably be fine.). In the end, the fabric was the winner.

And then I discovered that while a 30A would fit on of a yard and a half of fabric, a 30D certainly wouldn't. There are notes that you can cut this piece up, add seams, not cut on a fold, etc, but I couldn't see how that was actually going to help me. So I'm making the shrug instead. That does leave me me with about 20" of this 60" wide fabric left - I wonder what I could get out of that?
With only 4 pieces the shrug is really fast to cut. I'm trying it with "long" sleeves though.
With only 4 pieces the shrug is really fast to cut. I'm trying it with "long" sleeves though.
The directions for the sleeve bands made it sound like this (above) is what was needed. People with better spatial reasoning skills would have realized that that was crazy, and avoided this spate of seam ripping. I'm not totally sure what benefit is actually gleaned from folding (and pressing) the bands first, then unfolding them and stitching them into the round, and then folding them back how they go.
The gussets seem way bigger than they need to be. (Maybe the jacket version needs them this big, but the shrug doesn't.) The pattern directs you to match the roll collar to the marks. With the
exception of some notches for the center back, there are no other marks
relevant to the collar. The images available are so vague that I have no
idea if it's right. (I'm trying to figure out if pulling that piece
substantially tighter so it ends at the end of the gussets, instead of
the beginning, would improve the scenario.
The fit through the front, and back, for that matter, are large. I think the amount of fabric there may make sense for the jacket, but it is awkward on the shrug.
I did like the way the one side of the sleeve is longer than the other. The designer has a little description in the instructions about how this is supposed to mimic the curve that happens when you bend the arm, and I feel like that is accurate. I do like how the sleeves fit, although I would hesitate to label them as "long." 3/4 seems a more accurate description, and that's on me with my short arms.
Meh. It is fast to cut and sew. It IS comfortable. It's not very cute on though. I will probably wear it around the house, but doubt I'll wear it out.
So I did a bit of searching, to see what other sewists have made of this. There are a few instances of the jacket, but only one other example of the shrug (at least that I found). Birdandbicycle seems to have had similar issues. (She also seems to have positioned the roll collar the same way I did.)
 |
| Roll collar. Didn't bother to serge the edges. |
 |
| My first try at gussets! |
 |
| Hem around the edge of the gussett |
The fit through the front, and back, for that matter, are large. I think the amount of fabric there may make sense for the jacket, but it is awkward on the shrug.
I did like the way the one side of the sleeve is longer than the other. The designer has a little description in the instructions about how this is supposed to mimic the curve that happens when you bend the arm, and I feel like that is accurate. I do like how the sleeves fit, although I would hesitate to label them as "long." 3/4 seems a more accurate description, and that's on me with my short arms.
Meh. It is fast to cut and sew. It IS comfortable. It's not very cute on though. I will probably wear it around the house, but doubt I'll wear it out.
So I did a bit of searching, to see what other sewists have made of this. There are a few instances of the jacket, but only one other example of the shrug (at least that I found). Birdandbicycle seems to have had similar issues. (She also seems to have positioned the roll collar the same way I did.)


