Showing posts with label knit. Show all posts

Wednesday, March 4, 2015

What could be better than a red knit pencil skirt?

So, it seems most sewists on the interwebs are very stoked about the Mabel pattern. Something about it just doesn't look like it would work very well on me. It appears to be designed more for folks who are rather straight through the lower body. I'm really not. I also dislike the lack of elastic or fasteners, and I've seen a couple reviews noting that this can lead to an overly baggy or overly tight skirt, depending on which direction things go. Neither is really ideal.
The Wiggle Skirt pattern, however, looked much more promising, despite no reviews on patternreview. I also figured that if I was going to pay that much for a pencil skirt pattern, it should be something special.
I had hoped that those slash lines along the side panels were for slash pockets, but alas, they're not. I've gone ahead and made this up without trying to finagle pockets into there, but I imagine if when I make this pattern again, I will. (And it should be easy right? Draft a facing and a pocket bag, and there you go, right? Except, where does a pocket go in relation to the lining?)


http://iconicpatterns.com/wp-content/uploads/1201_back_env_web-510x600.jpg
And I just saw this image. I had not even considered color-blocking prospects, but there are some excellent ideas here.  

I went ahead and left the back pocket flaps off, since they're not covering actual pockets.
The fabric is a red ponte from Girl Charlee (yes, I get a lot of my knits there). The lining is just a cheap nylon lining fabric. (This reminds me - whatever happened to tricot? The chain fabric stores don't seem to carry it anymore, and online searches for tricot fabric find me something quite sheer that doesn't match up to my recollection of tricot.) The pattern calls for .92 yards of 60" wide fabric. I suspect that's about right, but who knows, since I don't know of a world in which one could buy such an amount. I made the size 8, and while I had leftover fabric from the yard I started with, I'm a little suspicious that the pattern calls for the same amount no matter the size. All of the long panels fit across one width of the fabric, with a little bit of fabric left. At a bigger size, I'm not sure you could get them all across like that, and 1 yard isn't long enough to stack them.

The pattern is well drafted with different pieces for the lining. There are quite a few waistband pieces, giving a nicely curved waistband with a number of places one could tweak it. (Next time I will take some darts out of the back pieces before cutting so it will be more curved for a better fit.)

It seems like this took no time at all to cut, which doesn't really make sense given how many pieces there are.


Things got substantially slower when I got to the step to attach the lining. The procedure is similar to that used for the Cambie (i.e., no hand sewing). Somehow it seemed less confusing for the Cambie though. I was silly enough to do the understitching with a straight stitch, which did not work out well. I unpicked it and topstitched it instead with a triple stretch stitch. (It seems like understitching with a lightning sttch would be oddly bulky, wouldn't it?)

And I finished this months and months ago, but haven't gotten around to photographing it. It is very comfortable, looks great, and gets quite a bit of wear (for a skirt in my wardrobe anyway). More will be made! In the end I very much feel that I got my money's worth from this pattern. The directoons and drafting are both excellent. 

Tuesday, February 24, 2015

Butterick 5857: Or I should have made a muslin

In my quest to sew some new things for an upcoming vacation, I pulled both a pattern and fabric that were in my stash. 
The fabric is a black and burgundy stripe, probably about 8 ounces, from Girl Charlee. I really like this fabric, and am having a bit of buyer's remorse for using it for this top. I really hope I get a lot of wear out of it!  This is a case where a lighter fabric (say 6 oz.) might have been perfectly fine. Especially for the ruching. It's not too heavy, but the weight does add up here. 
I cut a medium, which was kind of a stab in the dark since there were no finished garment measurements anywhere. But hey! It's a knit, so surely it's designed with negative ease! They must have thought finished measurements would be unhelpful/misleading! These are the things I told myself as I cut. I liked the idea of the lower crossover back, but being a person who is always cold (and travelling to Paris before it's even really spring), I knew that would be a poor choice. So I lined the center back marking up on the fold, and used another knit back piece (tonic tee) I had handy to cut the neckline. 

This alteration actually worked out nicely. 
Then I started sewing. Those ruched panels are super long. It's okay, they'll be ruched, right?
Well, I got them onto the top pieces, tried it on, and it was closer to dress length than top length. Long even for a tunic! (Which is not what it is supposed to be.) I know I'm short, but not really in the waist. Again, finished measurements would have helped. The shirt was also really wide. Really wide. So I pinched some out of the side seams, basted, and then sewed and cut new side seams. In the end, my new seams were more than two inches wide! In the final line of stitching, I angled them off into the sleeves, about an inch higher than the original sleeve separation point. Oh, and I resewed the high waist about an inch higher. 


And then I cut about 4" off the bottom, and made a generous hem. For the record, I highly doubt the hem meets my normsl standards for evenness. But hemming something this seriously ruched? I don't really know how that's supposed to work. But you put the thing on, and arrange the ruching/hem in the process, and voila!


Sunday, October 5, 2014

Teal jacket - no, shrug

I've been thinking about the Cake Patterns Carmine jacket since it was first announced. Why it has taken me this long to get to it I cannot say.
http://sewingcake.com/3334-carmine/
I found this lovely teal, ever so slightly sparkly ponte knit at Joann's and thought it would be perfect. I duly bought a yard and a half per the pattern's note that that was what I would need for a size 30. I opted to cut the 30D even though I probably should have followed the instructions to add extra to the bust. But then I realized that the next size up needed almost another full yard of a fabric, and there was no way that would work (plus, knits stretch! It would probably be fine.). In the end, the fabric was the winner.


And then I discovered that while a 30A would fit on of a yard and a half of fabric, a 30D certainly wouldn't. There are notes that you can cut this piece up, add seams, not cut on a fold, etc, but I couldn't see how that was actually going to help me. So I'm making the shrug instead. That does leave me me with about 20" of this 60" wide fabric left - I wonder what I could get out of that?

With only 4 pieces the shrug is really fast to cut. I'm trying it with "long" sleeves though.
The directions for the sleeve bands made it sound like this (above) is what was needed. People with better spatial reasoning skills would have realized that that was crazy, and avoided this spate of seam ripping. I'm not totally sure what benefit is actually gleaned from folding (and pressing) the bands first, then unfolding them and stitching them into the round, and then folding them back how they go.

Roll collar. Didn't bother to serge the edges.


My first try at gussets!
Hem around the edge of the gussett
The gussets seem way bigger than they need to be. (Maybe the jacket version needs them this big, but the shrug doesn't.) The pattern directs you to match the roll collar to the marks. With the exception of some notches for the center back, there are no other marks relevant to the collar. The images available are so vague that I have no idea if it's right. (I'm trying to figure out if pulling that piece substantially tighter so it ends at the end of the gussets, instead of the beginning, would improve the scenario.


The fit through the front, and back, for that matter, are large. I think the amount of fabric there may make sense for the jacket, but it is awkward on the shrug.
I did like the way the one side of the sleeve is longer than the other. The designer has a little description in the instructions about how this is supposed to mimic the curve that happens when you bend the arm, and I feel like that is accurate. I do like how the sleeves fit, although I would hesitate to label them as "long." 3/4 seems a more accurate description, and that's on me with my short arms.

Meh. It is fast to cut and sew. It IS comfortable. It's not very cute on though. I will probably wear it around the house, but doubt I'll wear it out.


So I did a bit of searching, to see what other sewists have made of this. There are a few instances of the jacket, but only one other example of the shrug (at least that I found). Birdandbicycle seems to have had similar issues. (She also seems to have positioned the roll collar the same way I did.)


Thursday, July 31, 2014

Sundress Sewalong

Last year I made a sundress. In October.

This year, with some prompting from Heather's sewalong and excitement about the Maria Denmark Signe pattern, I made one in July. So much better!
This is an ity knit from. . . somewhere online. The red is a little more orange than I had imagined, but I think it still works for me. I lined the bodice with some nylon knit lining in my stash. Then I realized that there was a reason this pattern has you line the bodice in the fashion fabric, so I re-cut the strap portion and stitched them onto the main portion of the bodice.
I did a FBA, which means I've got some darts not in the original pattern. I'm kind of resigned to the need for darts, although I did first try an alternate FBA method that wouldn't add darts. It was not good, so I went back to the Y adjustment. In addition to the FBA, I graded from an XS for the bodice to a medium for the waist. I probably could have gone with a smaller size through the back, and/or a shorter piece of elastic pulled tighter ( the piece I used wouldn't have stretched farther though).
Otherwise, I didn't make any changes, and I love this dress!
In a more opaque fabric and/or with a partially lined skirt, this could be worn without a slip, and, for the less busty, without a bra. I think for many people that may be the ideal maxi dress. 

Oh, and the neckline doesn't gape. Yay, summer!
I don't have much to say here. This is a great, simple, fast pattern. Perhaps next time, pockets?

Outfit Along

I decided to participate in the outfit along put together by Lauren and Andi. The concept of planning projects to work together is a good one, even if I didn't plan this project as well as I could have.
Who knits a worsted weight, wool cardigan in the summer? Me, apparently. I'm kind of scared of cotton for knitting. I've heard it can stretch out of shape easily (and won't spring back), and so so far I've stuck pretty much with just wool. Am I needlessly chicken?

This is the Marion Cardigan made from Cascade 220 Paints in Cherry Berry. I didn't realize how dark the blues in this yarn were until I had knitted a bit. I like it for the sweater, but it seems like a lot of color to go with the turquoise dress that I had also started.  I started with a small, and graded out to a medium to acquire more bust space. That worked out well, though I haven't yet resolved how the numbers make sense based on how many stitches I calculated I would need to add. I continued with the medium to the waist, so as to have some positive ease there, per Amy Herzog's suggestions in Knit to Flatter. It is too much, though. I don't know if that's an issue of personal preference, or that it's a cropped length.
I also opted to make the sleeves full length. Even before I got to that length, however, it became clear I wasn't going to have enough yarn, even for the length as written. Luckily I was able to get another skein in the same dye lot. I stabilized the button band with grosgrain ribbon per lladybird's tutorial. (Although getting the buttonholes to match up was . . . difficult.)

The dress I originally planned is the Sewaholic Cambie in a turquoise rayon/linen blend I bought a couple years ago. Being more hourglassy than pear, I had avoided this pattern for awhile, even though I really liked it on others. Gathered skirts aren't usually a good look on me, so I went with the A line. Even though linen is one of the recommended fabrics for this version, it strikes me as a little overly sturdy for this design. I may yet make the other view in a lighter fabric before really deciding how I feel about this pattern. I really like the designs of Sewaholic patterns, and the instructions, and techniques used, but on me, they leave something to be desired. (Also, I think the bodice here is a bit long - which is bizarre, because I don't often have that problem. Although I did with the Renfrew.)


So, I decided to make a second dress to go with this sweater. I settled on another Georgia dress, made from a navy blue ponte. It's a rayon, poly, lycra blend double knit. It's only 1% lycra, so it has very minimal stretch (more like a stretch woven than a knit). The color is very similar to the darker blues and purplish shades in the yarn. The bodice lining is a cheap nylon knit. I made the straps wider, and cut the piece down the middle to take about an inch out of the length. Then I took the straps up another inch in the process of attaching them. Otherwise I did not make any changes from my last version. I had planned to do a twin needle hem, but don't have one for knits right now, and couldn't get a nice stitch without skipped stitches. So I opted for a single line of stitching, with a longer stitch length, and wooly nylon in the bobbin. Since the dress has so little stretch, I think it will be okay. As before, I love this dress.

Sunday, July 13, 2014

Red princess seams

I printed the Penny Pinafore pattern the other night, and taped and then cut away.
I like the concept of pdf patterns with the lines in different colors, but for those of us with plain black and white printers, that doesn't always work out so well. Instead of cutting in the daylight, as I should have, I did it when it was getting pretty dark. And while the dining room light is one of the brightest in the house, it doesn't do great for very slightly different types of lines. The plan was to cut such that I could grade between the 3 and the 5. I discovered the next morning that on some sides of these, the 3 is outside of the 5, and I therefore chopped it off. Oops.
Anyway, I pressed ahead with a FBA and a muslin (tracing a line a bit outside where I cut the line I needed). While the fit was overall quite good with just the FBA and some grading out towards the hips, it was a bit big, and the positioning of the princess seam line is kind of weird. I thought I must have screwed something up in the course of the FBA, but I think that's more of an issue with my weird adjustment after having cut off the line I needed.

So, the next day I reprinted the pages to reconstruct the sides where I'd cut the needed lines off, and went back to work. I did scale down to the 2 grading out to a 4 through the waist and hips.


Things I like:
  • The level of the neckline, and the height from shoulder to bust. I am short through there, so it's easy for necklines to end up super low, but not here!
  • The princess seaming. It looks great, and the FBA is so easy!

Thing I'm on the fence about:
  • The neckband is super short! For the muslin, I put it on last (er, halfway), since I wasn't sure if I was going to bother with it anyway. It did not work out well, and I'm too lazy to unpick it on a muslin. Anyway, lesson learned. Put it on before sewing the 2nd shoulder seam, and pull that puppy tight (or it won't reach nearly far enough!). I also cut the neckband based on the 3 for the actual top, instead of a 2 to match the top of the bodice.

Changes I made:
  • FBA (2" added each side) (The pattern instructions say you probably don't need a FBA with this pattern. While that may be true for folks with a C or D cup, I really don't think that's true for me.)
  • Graded from a  2 to a 4 (muslin was from a 3 to a 5 - could still use a smidgeon more space through the waist, and less through the hip)
  • Lengthened the cap sleeve a little, didn't use the sleeve band (I don't really like a banded sleeve that short)
  • Shortened the tunic length to a regular top length (cut off about 3 inches total)


And here's a lesson from the world of knitting that seems to apply - in knits, negative ease through the bust and hips can be good, but positive ease works much better in the waist. (Thank you Knit to Flatter.) This top is okay, but if I had another inch through the waist I think this would be more comfortable and more flattering.

The fabric is one yard of a cotton lycra blend from Girl Charlee. The pattern claims 1.75 yards are needed for the tunic length. I wasn't sure how big this piece was when I started, but I started laying the pieces out and they fit.
I realized toward the end of stitching this up that I cut the pieces sideways (I wonder if that's why they fit?). With small lengths of fabric I tend fo be careless about figuring out which way is which, especially with knits (where the selvage may not be so obvious). Of course, if I was thinking more carefully I could have just looked at the direction of the stitches and seen that it was sideways, but I didn't. Luckily it still fits, and there's enough vertical stretch that it's okay.

I've been watching the Sew Better, Sew Faster class on Craftsy which I bought awhile ago on a sale. While I doubt I'll ever make the jacket that's part of the class (it is not my style), it is a great class! Some of the techniques I've learned made this project much easier (especially handling the curves of the princess seams -- I'm not brave enough to ditch the pins yet though).

And finally, I seem to be demented at sewing elastic on the shoulder seams. How does one do this? Most attempts tend to end with the elastic and fabric getting sucked down into a mess in the feeddogs. I managed to get it on here by pushing it through the serger. What am I missing?

Despite my screwups, I love this pattern, and this top. More are definitely in my (near) future. I also just bought the Comino Cap top, and that will be coming up soon, once I figure out which version to start with, and what fabric from my stash to uses. 

Saturday, May 3, 2014

Jalie 2794 - no exciting title!

Yeah, I'm not good with titles.
Anyway, I have just finished Jalie 2794.
The fabric is a grey and black floral modal cotton knit, with 2% spandex, from Girl Charlee. It is the 9 oz weight, which I consider just about ideal.


I did a FBA, adding one inch to each side, which is about 1/2" less than I would usually add, but so many reviews of this claim no FBA is needed.


Well, I muslined that up in a cheap, very stretchy knit, and it seemed about right. I'm calling this a wearable muslin, even though because of the issue with the front gathering I might not wear it out of the house. (very stretchy = front gathering didn't work as intended) Sorry it's so wrinkled - I wore it for the day before I took this.

In my stiffer, yet adequately stretchy (according to the pattern) fashion fabric, I realized I probably should have gone with a larger FBA. It fits without much in the way of drag lines, but it is snug through there.

I made a size S, based on my high bust measurement and wanting a little more room for seam allowances. Jalie's 1/4" seam allowances scare me a little. Based on the muslin, I took a little bit out of the back neck by rotating the back pattern piece just slightly - which also gave me more room in the hip, which I certainly could use at that size.

I remain somewhat unhappy with steam a seam lite. I used it in the sleeve hems and the hem, and while I like how easy it makes hemming knits, I still don't like the feel of the result. It's just too stiff for my liking, and removes too much of the stretch.

In other news, I considered doing Me Made May, but don't think I really have enough every day sort of self-made clothing to make that very practical (read = not stressful). Instead, I'm trying to think through what I do wear on a regular basis, and am giving some more thought to how I ought to tweak my sewing habits to coincide with that. (Let's be honest - my knitting habits actually coincide quite nicely with the concept of everyday wear. Most of what I've made so far is not weather appropriate for May, however.)

Wednesday, April 30, 2014

Slow Start

So, 2014 has been off to a slow start sewing wise. I made the husband another pair of pants. I've done quite a bit of knitting. I made a Tonic Tee, and a skirt.  That covers January through April!

Tonic Tee

The Tonic Tee is a really nice pattern - I know this may mark me as crazy, but I like it better than the Renfrew. With a bit of a FBA, it fit me great right out  of the gate. Except I should have added some length. While I am often considered "petite," what height I do have is in my waist. I took out about 3/4 of an inch between bust and shoulder, as I'm short through there, but did add a bit of length back in the process of the FBA. I could use another inch, maybe two to get this to a length that is really best for me.

More Tonic Tees are in my future. 
Oh, and this pattern goes together really fast. 

This puppy doesn't get a lot of wear, however, because it stinks - literally. I didn't notice it in the fabric shop, but there is a pretty horrible chemical smell to this fabric. When I've worn it people assure me, when asked, that they can't smell it, but I can. I think it is something to do with  a specific black dye, but don't quote me on that. I have a pair of rtw black pants that have the same smell, only worse. So bad that they made other items in the wash their first time through also smell. So bad that I washed them in vinegar, and then baking soda, and then again, and then left them in the garage to air for a month before wearing them. And I can still smell them. Since this project, I've started sniffing at any black fabric or clothing I'm considering, right there in the store. People in stores may think I'm nuts. (While the scent in the pants in question is stronger than this shirt, since they're farther from my nose they are somewhat less offensive to wear.)


Gored Skirt

The skirt is Simplicity 1560, view b.   This pattern is a recent release, although it was out previously, around 2001 or thereabouts. I loved it then, and I love it now. The view I usually make is a gored skirt with a lovely swish in the right fabric. I found this beautiful wool on a cold day in January, and this seemed the perfect option. While it is a cute skirt that I'll wear plenty when we return to winter, this wool really is too heavy for this design. It would have been better for the a line version. 

(Speaking of which, does anyone find the images on pattern envelopes misleading with regard to fabric suggestions? I mean, here we get a photo of view b, in what looks like a wool. A pair of pants I'm working on has a photo of the pants in what looks like wool, when that's definitely not one of the suggested fabrics.)


I fully lined this is Bemberg rayon, hemming the rayon to the wool. Probably should have let the lining hang free, as it does affect the hang of the skirt a bit.  And I should have made the waist facing out of something other than wool, as that is a smidge itchy. 

Even fully lined, this was a quick and easy sew. In a shocking variation from my normal trend, I didn't bother to muslin this at all. I chose my size based on the finished garment measurements, and just forged ahead. (I didn't even trace the pattern!) And it fits great, but I think there's less to be worried about fit-wise in a skirt. I did have to chop a couple inches off the bottom to hem it to an appropriate length. When I make it again (and I will), I should probably find a lengthen/shorten line further up to remove the excess length. 
Previously, I made it a couple times in stretch cotton sateen. That was better, but it would really sing in something lighter still. Swing dancers, if you're looking for a great trumpet skirt pattern, this is it! It has just the right amount of swish when swiveling, yet doesn't fly up in the course of spinning. 


Knitting

I started knitting right at the end of December, and I love it! It seems much easier than sewing to do in small bits and pieces, which may be why I feel like I've gotten more done there than sewing. So far, I've knitted two scarves, a cowl, a pair of hand warmers, a pair of socks, and a sweater. I've just started the Georgina Cardigan.  
If you're interested, you can see my projects on Ravelry. 

Friday, December 20, 2013

Chevrons and a lesson in steam a seam

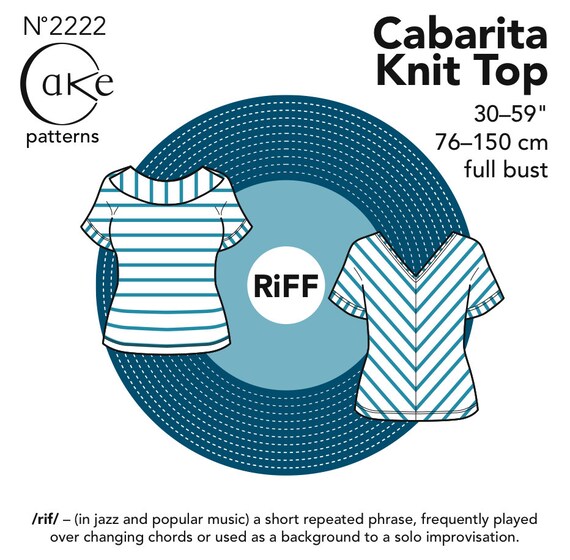
I really do like the sizing for Cake Patterns. Here's a first stab at the Cabarita top.
Since I'm almost always wearing a sweater, going to the trouble to do chevrons on the back of the shirt just doesn't make sense. You'd never see them. So I dispensed with the collar, and planned for the chevrons in the front. I've never sewn anything that really required matching the fabric up carefully, so that was a first. I did a pretty good job of matching the three different stripes up in cutting, but some of them got off by a little bit when it came to sewing it up (stretch fabric being stretchy and all).
Note that on my dressform it looks better, since my dressform doesn't have the high bust/short upper torso issue.
I used steam a seam to help with the bottom hem (and stitched with a twin needle). It looks okay, but it feels super crunchy, and killed the stretch. Since I cut the top without much lite. Which is apparently what I should have gotten. Or fusible thread.
negative ease that's okay too, but it doesn't feel good. And thus I learned that there's also steam a seam
I also should have done a high bust/short upper torso adjustment of some sort, and, looking at the pictures of the back, maybe a sway back adjustment? It never occurred to me that that was a problem I have, but maybe so.

I cut the band for the neckline so the stripes go across it (perpendicular to the stripes of the chevron), and I'm not a huge fan of that. I think I would have liked it better if I'd cut a stripe so it would be one solid color.
Also, what's up with the sleeves? I by no means have tiny arms, but the sleeves are either too wide, or not floofy enough.

(Fabric for this is a 7oz cotton jersey from Girl Charlee. Too thin, but not by much.)

And it's really too short. Not terribly so, but I could have used some more length in the front especially (I did not do a FBA, but maybe I should have gone down a size, done a FBA, and made it a bit longer). (It's not crooked in the I cut like it appars here. That's just some quirk of how I am standing.) I cut the 35, at the 24" length, and chose the cutting lines not based on my measurements, but based on some of my favorite rtw knit tops. In lighter weight knits, I've found negative ease to be a bad thing, and I found that my my favorite shirts had the following measurements (1/2 of the front)

At waist At hip
8.5 9.5
7.5 8.5
8 10

So, I wound up putting the waist at about 32.5, and the hip at 37. This is not just no negative ease, but some positive ease through the waist, and a tiny but of negative ease in the hip. 

Sunday, October 13, 2013

Cake Red Velvet Sewalong


Red Velvet Sewalong Penelope House
Next month I'll be participating in the Cake Red Velvet Sewalong. I'm moderately excited for this dress, since, although it's simple, it has a very similar silhouette to my two favorite (and most comfortable) dresses.

I also just bought some ITY jersey from fabric.com (that I can't link to, because I bought the last of it). I've been experimenting with different knits, and I think ITY may be the answer to my question of what the knits are that look a little dressier, that are often used in rtw. (You know, the ones with a little bit of sheen to them, without being shiny.) Since there was so little left in this particular fabric, and it was on sale, I didn't bother requesting a swatch. If it doesn't for some reason, seem like a good fit for the Red Velvet, I'm sure I can find a use for it.


Saturday, October 5, 2013

Not a Sailor Top

I recently made Cake Patterns # 2223, the Bonny Knit Sailor Top.
While I think the sailor-y version of this is cute, I'd rarely wear it outside of swing dancing, and we don't dance that much these days. It includes very brief instructions for making it without the collar.

Fabric:

I used a 7 oz teal rayon jersey. The fabric is not ideal here. It shows every lump and bump. If I wear a camisole under it, it is wearable. There's still a bit of unpleasantness over my stomach, but I think if I resume pilates/yoga I can probably get my stomach toned back up enough that that won't be an issue anymore. I've been slacking on the exercise. (And actually, it's not nearly as bad in the photos as it seems to me in real life.)

What I'm figuring out on knit weights:

(Table adapted and improved from a post  here.)
Weight Oz Notes
tissue weight 3 oz Fluttery and very translucent; layers must be doubled, at least in the front, for t-shirts
lightweight 5 - 7 oz Nice drape but will show indentations made by undergarments.  Could be an issue with rayon knits only at 7 oz? 
midweight 9 oz Firmer drape that skims more nicely over the body
heavier 10 oz Thicker, not at all drapey. See my Renfrew attempt.

Pattern:

Figuring out how to take these has been a pain. Any
place I've got a mirror has terrible lighting.

The pattern itself is quite neat. It's the first Cake pattern I've made. You customize the pattern based on your measurements (literally drawing some of the lines on, based on printed guides), and the result is a top that fits my figure pretty darn well. While I'm pretty short, I'm not exactly petite. My legs are short, my waist is long, but I have a high bust and/or am just petite from bust to shoulder. The result is that I think I need to do a petite adjustment so the sleeves sit in the right place.

I also had to re-cut the central panel as the neckline was way too low. Like not appropriate to leave the house in low. If I do a petite adjustment on future versions, that may solve this issue, but I'm going to have to do some testing as I go to make sure. When I re-cut the center panel, I added about two inches. Also, since the first version, with the top piece interfaced per the instructions, resulted in a neckline that wasn't just low, but also seriously gapey, I re-cut that piece too, doubling the height, folding it over, and stretching it taut as I sewed. Still not perfect, but better.

Because this pattern is a "riff," and the instructions are pretty brief (especially for the not sailor version), I'm not really clear if I did the neckline binding correctly or not. It seems like it might be best to do the binding, and then attach the center panel (i.e., in the reverse of how the instructions have it).

Part of the reason I was drawn to this pattern was the princess seeming. I have a rtw top that has very cute (similar) lines, and looks amazing on. In a less clingy fabric, I still think this has similar potential. (I'm also considering this book to learn the rub-off technique to duplicate it a little more exactly. I have terrible spatial reasoning skills, so while this would probably be quite simple for some sewists, I need more hand-holding.)

Oh, and I got a serger! This was the first thing I sewed using it. I've used one before (my mom has one), but I never quite felt I could justify the expense. So far I like it. Learning to thread  the lower looper was a major pain, but I think now that I've got it I should be fine.